Today I will show you how I make my felt animal habitats for Busy Bag Exchange group. We will be making 6 habitats (shark, bird, butterfly, owl, monkey and frog).
Materials:

Felt (various colors)
Binder rings (2)
Hole reinforcements
Fabric marker
Glue gun
Scissors
Hole puncher
Ruler or any other measuring tool
and patience
Steps:
1. Prepare habitat squares
2. Build habitat scenes
3. Put it all together
Here we go!
Step 1.
This is probably the most tedious and hardest part of this whole process.
Using a 4 inch by 4 inch ruler square (you can also use any ruler you have, just make sure you are measuring 4 by 4) cut out 7 squares of felt according to the colors you would like for your background and cover.

Colors I used are as follows:
FROG- yellow
BUTTERFLY - dark green
BIRD- light green
SHARK - light blue
MONKEY - grey
OWL - midnight blue (darker blue)
COVER - orange

Once you have your squares cut out, using the same ruler and a marker measure and mark with a dot 1/2 inch from left and right sides of the square and about a 1/4 inch down. Here is a visual.

After all your squares are marked use hole puncher to cut out holes where the dots are. I'm sure there is a tool you can use to make this easier, but I do not have it and do not know what it would be called :) Anyhow, most of the felt will not punch easily, so you will have to use some force and scissors to finish cutting the hole.


Apply reinforcements to both sides of the hole. NOTE: I bought clear reinforcements from Office Depot and they held better than white ones from Dollar Store. At this point your squares should look similar to this.
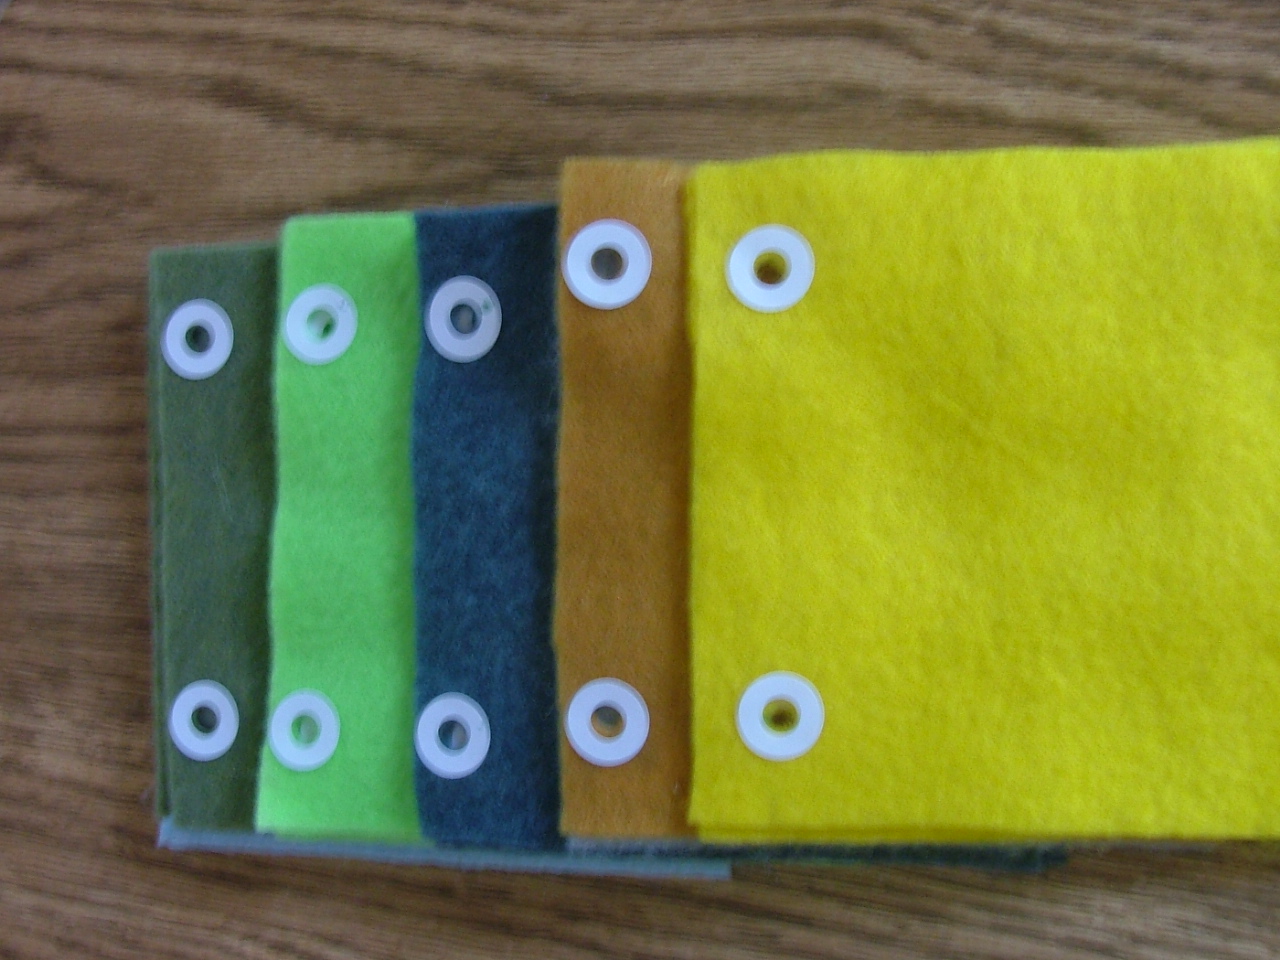
Your felt squares are ready for action!
Step 2. Building habitat scenes
This step here is a 3 sub step process. Cut out felt (Monkey , Bird, Frog, Owl, Shark, Butterfly), put it together and set it aside. DO NOT GLUE the pieces yet. You are more than welcome to veer off the pattern provided and create your own habitats!
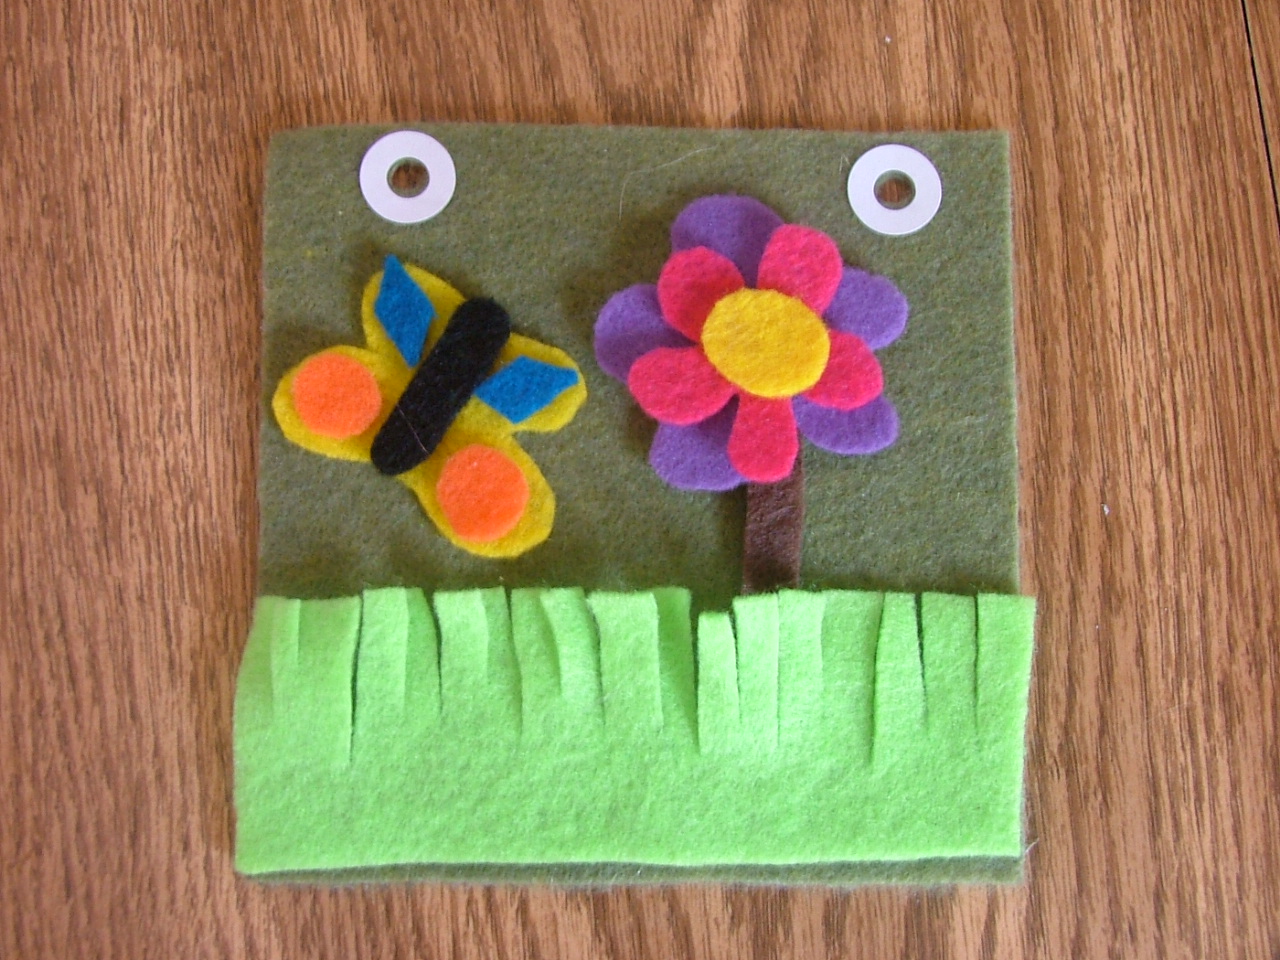
Lets start with the frog.
Cut out the pond, lily pad and flower. Stack them and place on yellow square, just like so.

Continue onto making the frog and place it in the pond.

Do the same for shark habitat. (I wanted dolphin, but could not get it to look like one so stuck with a shark :)

And butterfly habitat.
And of course silly monkey habitat.

Almost there... Do the same with bird habitat.

And lastly, the owl habitat. Aren't you glad there's only 6? :)

YAY! Now you can adjust the pieces. Using fabric marker fill in the details, such as dots in the coconuts, stand for bird house, owl feathers etc... Once you are satisfied how things look go ahead and start gluing them using hot glue gun. DO NOT GLUE THE ANIMALS TO THE HABITAT. These fellas have a special place for them.

Step 3. Putting it all together.
Using the last square of felt cut a small square that will act as a pocket and glue the sides and the bottom to the cover. This is where your child can store the animals. Once the glue dries (should be no more than a minute) go ahead and put these habitats on 2 binder rings and use it as a book.

Some activities you can do with this book is talking about each animal, where they live, what they eat etc...
If you have an overabundance of stuffed animals or beanie babies, set them out and have your child match habitats to the stuffed animals. And don't forget to make the animal sounds!!!
You're DONE! Woot Woot!!! Or, should I say " Ribbit Ribbit"
Enjoy!


